Creating a posting application using Laravel CRUD processing Part 7 Creating a contact form
Aug 27, 2020
PHP
Beginner
Laravel
Laravel7
miriwo_laravel Tutorial
Purpose
- Summarize how to create a Laravel application with a CRUD process that is the basis for creating an application like a tutorial
Implementation environment
- Hardware environment
| Item | Information |
|---|---|
| OS | macOS Catalina(10.15.5) |
| Hardware | MacBook Pro (13-inch, 2020, Four Thunderbolt 3 ports) |
| Processor | 2 GHz Quad Core Intel Core i5 |
| Memory | 32 GB 3733 MHz LPDDR4 |
| Graphics | Intel Iris Plus Graphics 1536 MB |
- Software environment
| Item | Information | Remarks |
|---|---|---|
| PHP version | 7.4.3 | Introduced using Homwbrew |
| Laravel version | 7.0.8 | Introduced by this method using commposer → Construct environment of Mac Laravel |
| MySQL version | 8.0.19 for osx10.13 on x86_64 | Introduced by this method using Homwbrew → Install MySQL with Mac Homebrew |
#Prerequisites
- An environment close to the implementation environment has been constructed.
- The author constructed the environment by the following method. -Construct Mac Laravel environment -Install MySQL with Mac Homebrew
#Prerequisite information
- Source code is here →https://github.com/miriwo0104/laravel_crud/tree/master
- Build and implement the same Laravel development environment as the implementation environment locally on Mac without using Docker or AWS.
- The source code actually created by the author in the tutorial will be released on GitHub.
- The completion of CRUD process will be set as the shortest goal, and validation etc. will be set later.
- If the same environment as the implementation environment can be prepared with Docker or AWS, I think that it can be implemented if you read it every time.
- This article is described based on the official document and one technical book. -Laravel 7.x -PHP framework Laravel Web application development version 5.5 LTS compatible -This article is planned to be divided into series. The article tag “miriwo_laravel tutorial” is added to articles in this series, so if you want to see other articles, please use it.
- Create a contact form using email sending, but the email is not actually sent and the content of the email is recorded in the Laravel log.
- Email is not sent, but the mail destination is “admin@example”.
#After reading this article
- It is possible to create an inquiry form in which the inquiry contents are sent by email.
Overview
- Modify the .env file
- Writing routing information
- Creation and description of controller file
- Creating a view file
- Creating and writing a mailable class file
- Creating a view file for mail
- Confirm
#Details
-
Modify the .env file
-
Writing routing information
-
Execute the following command in the Laravel application name directory to create a routing file.
$ vi routes/web.php -
Add the following routing information to the opened routing file.
Route::get('/inquiry/input','InquiryController@input'); Route::post('/inquiry/send','InquiryController@send'); -
List the entire contents of the routing file below.
<?php use Illuminate\Support\Facades\Route; /* |------------------------------------------------- ------------------------- | Web Routes |------------------------------------------------- ------------------------- | | Here is where you can register web routes for your application. | routes are loaded by the RouteServiceProvider within a group which | contains the "web" middleware group. Now create something great! | */ Route::get('/', function () { return view('welcome'); }); Auth::routes(); Route::get('/home','HomeController@index')->name('home'); // Add the following Route::get('/inquiry/input','InquiryController@input')->name('inquiry.input'); Route::post('/inquiry/send','InquiryController@send')->name('inquiry.send'); // Add up to the above Route::get('/input','ContentController@input')->name('input'); Route::post('/save','ContentController@save')->name('save'); Route::get('/output','ContentController@output')->name('output'); Route::post('/delete','ContentController@delete')->name('delete'); Route::get('/edit/{content_id}','ContentController@edit')->name('edit'); Route::post('/update','ContentController@update')->name('update'); -
Save and close.
-
-
Creating and editing controller files
-
Execute the following command in the application name directory to create a controller file for sending mail.
$ php artisan make:controller InquiryController -
Execute the following command in the application name directory to open the controller file created earlier.
$ vi app/Http/Controllers/InquiryController.php -
Modify the opened controller file as follows.
<?php namespace App\Http\Controllers; use Illuminate\Http\Request; // Add the following use Illuminate\Support\Facades\Mail; use Illuminate\Support\Facades\Auth; use App\Mail\SendMail; // Add the above class InquiryController extends Controller { // Add the following public function input() { $user_infos = Auth::user(); return view('inquiries.input', ('user_infos' => $user_infos, ]); } public function send(Request $request) { $inquiry_content = $request->all(); Mail::to('admin@example')->send(new SendMail($inquiry_content)); return redirect(route('home')); } // Add the above } -
Save and close
-
-
Creating and editing view files
-
Execute the following command in the application name directory to create a directory for storing view files.
$ mkdir resources/views/inquiries -
Execute the following command in the application name directory to open the view file.
$ vi resources/views/inquiries/input.blade.php -
Modify the opened view file as follows.
<form action="{{ route('inquiry.send') }}" method="POST">
    @csrf
    <p>Inquiry contents</p>
    <textarea name="content" cols="30" rows="10"></textarea>
    <p>Customer name</p>
    <input type="text" name="name" value="{{ $user_infos['name'] }}">
    <p>Your email address</p>
    <p>{{ $user_infos['email'] }}</p>
    <input type="hidden" name="email" value="{{ $user_infos['email'] }}">
    <br>
    <input type="submit" value="send">
</form>
-
-
Creating and writing a mailable class file
-
Execute the following command in the application name directory to create a file in which a class dedicated to email transmission is described.
$ php artisan make:mail SendMail -
Execute the following command in the application name directory to open the class file for sending email created earlier
$ vi app/Mail/SendMail.php -
Modify the opened class file as follows.
<?php

namespace App\Mail;

use Illuminate\Bus\Queueable;
use Illuminate\Contracts\Queue\ShouldQueue;
use Illuminate\Mail\Mailable;
use Illuminate\Queue\SerializesModels;

class SendMail extends Mailable
{
    use Queueable, SerializesModels;
    // add the following
    public $inquiry_content;


    /**
     * Create a new message instance.
     *
     * @return void
     */
    public function __construct($inquiry_content)
    {
        // add the following
        $this->inquiry_content = $inquiry_content;
    }

    /**
     * Build the message.
     *
     * @return $this
     */
    public function build()
    {
        // add the following
        return $this
            // subject of the email
            ->subject('inquiry mail')
            // View file you want to display as an email
            ->view('mails.inquiry_mail')
            ->with([
                'inquiry_content' => $this->inquiry_content,
            ]);
        // add up to the above
    }
}
-
-
Creating a view file for mail
-
Execute the following command in the application name directory to create a directory that stores the view file you want to display as an email.
$ mkdir resources/views/mails -
Execute the following command with the application name to create a view file that you want to display as an email.
$ vi resources/views/mails/inquiry_mail.blade.php -
Edit the view file you want to display as an open mail as follows.
It is an inquiry email with the following contents.

{{ $inquiry_content['content'] }}
Send user name
{{ $inquiry_content['name'] }}Send user email address
{{ $inquiry_content['email'] }} ``` -
-
Confirm
-
Execute the following command in the application name directory to start the local server.
$ php artisan serve -
Access the following to login or register -http://127.0.0.1:8000/
-
Access the following and confirm that the screen of the image below is displayed in the browser. (The information of the logged-in user must be written in “your name” and “your email address.") -http://127.0.0.1:8000/inquiry/input
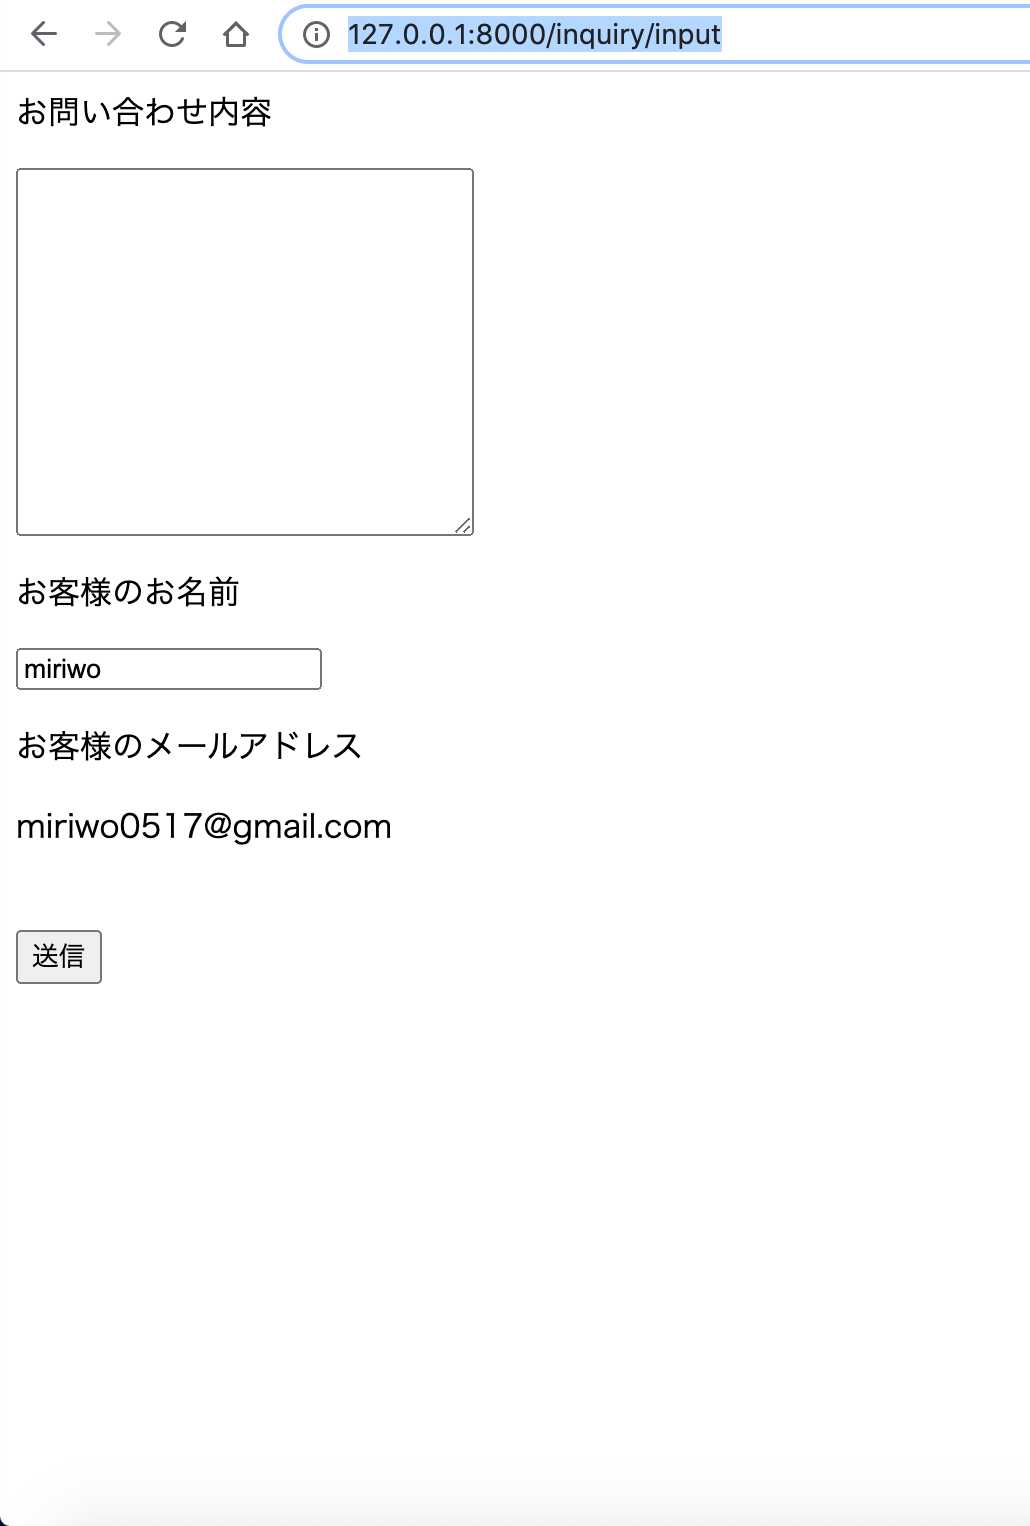 -
Enter any content in the text area below “Inquiry details” and click “Send”.

-
Make sure you redirect to
http://127.0.0.1:8000/home. -
Open the log file by executing the following command in the application name directory.
$ vi storage/logs/laravel.log -
The work is completed if the content of the email is written near the last line of the log file as shown below.
Date: Tue, 25 Aug 2020 09:37:02 +0000
Subject: inquiry mail
From:
To: admin@example
MIME-Version: 1.0
Content-Type: text/html; charset=utf-8
Content-Transfer-Encoding: quoted-printable

It is an inquiry email with the following contents.

This is a test
Send user name
miriwoSend user email [email protected]
``` -